
It is one of the most frustrating symptoms in PC building and repair: you press the power button, the fans spin up, RGB lighting illuminates, but your monitor displays a cold “No Signal” message before going blank. If your system powers on but shows no display, or if your existing setup suddenly goes dark, it can feel extremely concerning.
Black screen? Don’t panic — it’s usually fixable. In the vast majority of cases, it indicates a handshake failure during the motherboard’s Power-On Self-Test (POST) routine. Understanding the common causes of a black screen on boot — such as loose RAM or faulty GPU seating — helps you isolate the issue. Because the motherboard cannot verify a critical sub-system (usually the memory or graphics processor), it halts the boot process before initializing the display output.
In this guide, we outline the step-by-step diagnostic process to get your screen working again.
1. Black Screen on Boot: Cable and Input Routing
Before opening the computer case, rule out external display routing issues. Cable and port issues are one of the most common — and easiest to fix — causes of a black screen on boot.
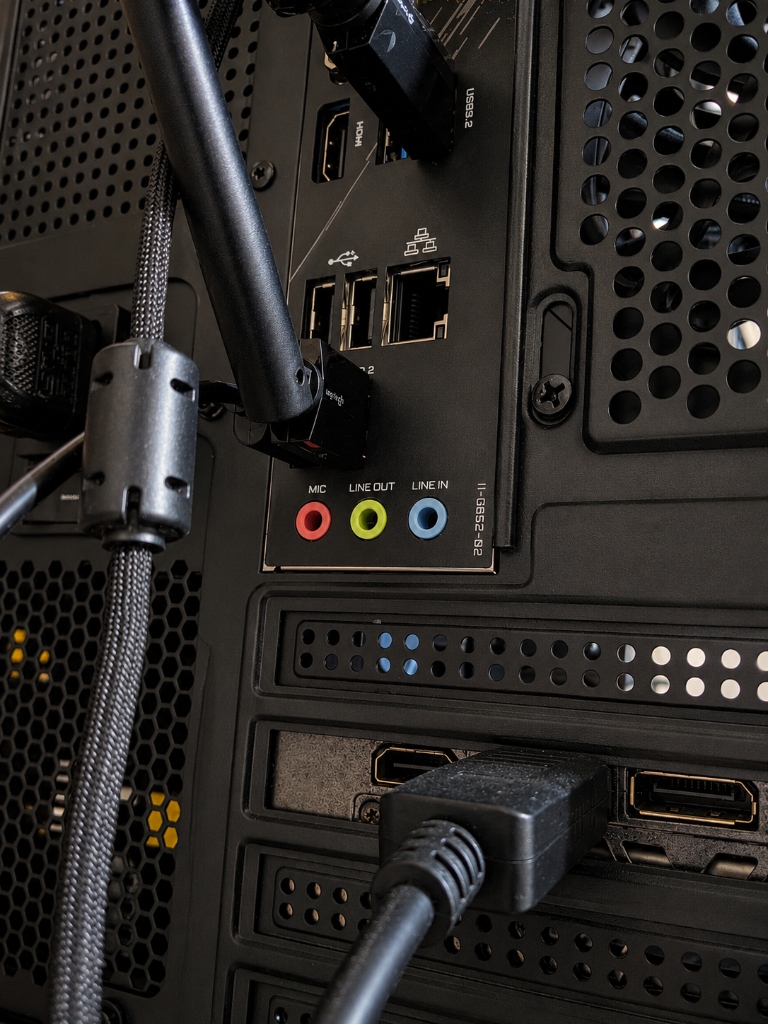
- Check the Port Location: If your processor has an integrated GPU but you have a dedicated graphics card installed, ensure your display cable is plugged directly into the GPU ports, not the motherboard. Plugging into the motherboard ports will result in a blank screen if the integrated graphics are disabled.
- Verify Input Source: Confirm that your monitor is set to the correct input channel (DP, HDMI 1, HDMI 2) using its physical buttons.
- Cable Check: Ensure the DisplayPort or HDMI cable is fully clicked into both the GPU and the monitor. DisplayPort cables can sometimes be blocked by the computer case’s metal PCIe support bars.
2. Reading Diagnostic Signals: Beep Codes and LEDs
Modern motherboards have diagnostic features to tell you exactly where the POST process failed. If your system turns on with no video output and no beep codes from the motherboard speaker, look for visual indicators on the motherboard:
A. EZ Debug LEDs
Most modern boards feature four small LEDs located near the 24-pin ATX power connector:
- CPU: The processor is not detected, is improperly seated, has bent socket pins, or lacks power.
- DRAM: The motherboard cannot read the memory modules.
- VGA: The graphics card is not detected, lacks PCIe power, or is unseated.
- BOOT: The system successfully POSTed but cannot find a bootable drive.
B. 2-Digit Q-Codes
High-end motherboards feature a 7-segment LED display. Common codes include:
00orFF: CPU failure or lack of power.50to55: Memory initialization error.b2or97: Console output/VGA device routing error.
Note: Exact Q-codes vary by motherboard manufacturer — always check your specific board’s manual for the definitive code reference.
3. Isolating Your RAM
If the DRAM LED is lit (or if your PC is power-cycling in a loop), a memory communication failure is the cause. This is a common issue on new builds or recent upgrades, as memory modules can easily shift or fail memory training.
- Power down the system, unplug the AC cable, and hold the power button for 10 seconds to drain residual capacity.
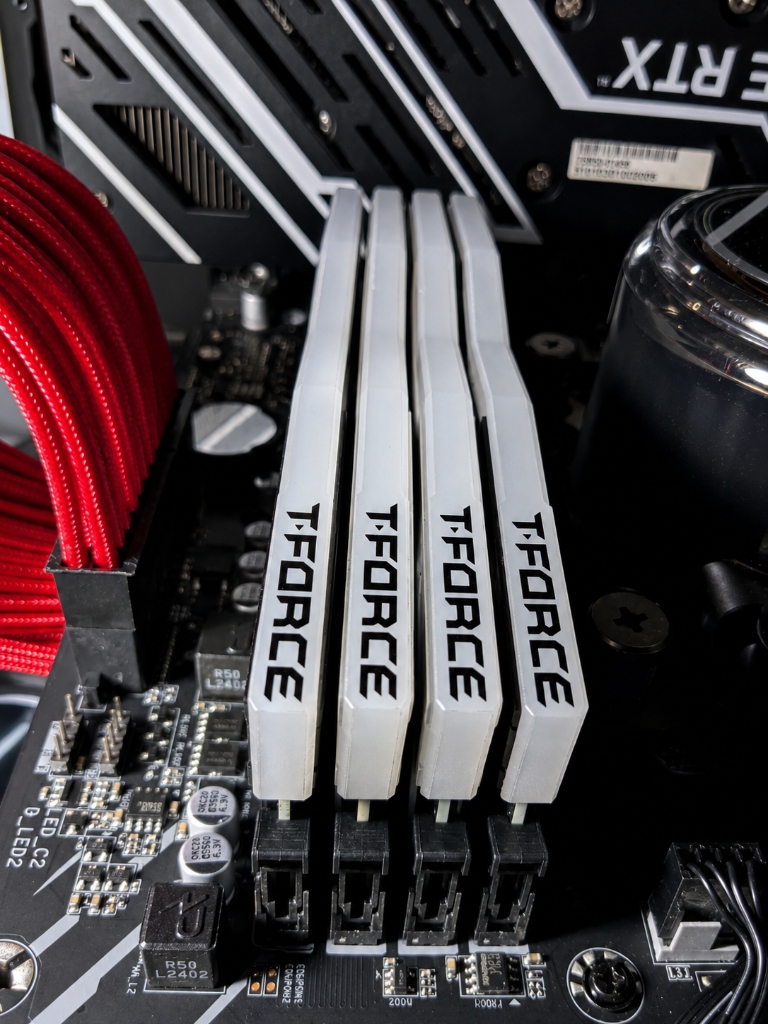
- Release the locking clips on your RAM slots and pull the modules straight out.
- Optional: Gently clean the gold contacts on the RAM sticks using a clean pencil eraser to remove oxidization, then wipe clean with 99% isopropyl alcohol.
- Try a Single Stick: Insert a single stick of RAM into the primary slot recommended by your motherboard manual (typically slot A2 or the 2nd slot from the CPU).
- Press down firmly on both ends of the module until you hear a distinct click. A slot clip that hasn’t snapped back into place is the primary indicator of an unseated stick.
- Power on the PC. If it works, test the second stick in the remaining slot.
4. Re-seating and Testing Your GPU
If the VGA LED is illuminated, the motherboard cannot communicate with your discrete graphics processor. Use these steps to isolate graphics card issues:
- Disconnect all monitor cables and GPU power cables.
- Press down the plastic PCIe slot release latch (similar to a RAM clip) at the back of the slot.
- Unscrew the bracket screws holding the GPU to the case chassis, then carefully pull the GPU straight out.
- Inspect the PCIe slot for dust. Blow it out with compressed air.
- Re-insert the GPU. Push down until the PCIe release latch clicks back into place. Secure the mounting screws.
- Verify Power Connectors: Connect the PCIe power cables. Ensure you are using separate cables from the power supply rather than daisy-chained splits if it is a high-draw card (e.g., RTX 4080/4090). Ensure they are fully clicked in.
- Plug the display cable back into the GPU port and boot the system.
5. Clearing the CMOS
Sometimes, an unstable RAM profile (XMP/EXPO) or improper BIOS setting gets saved in the motherboard’s volatile memory, causing boot hangs. Clearing the CMOS is an effective reset step that restores all BIOS settings back to safe factory defaults.
Method A: The CMOS Battery
- Power off and unplug the PC.
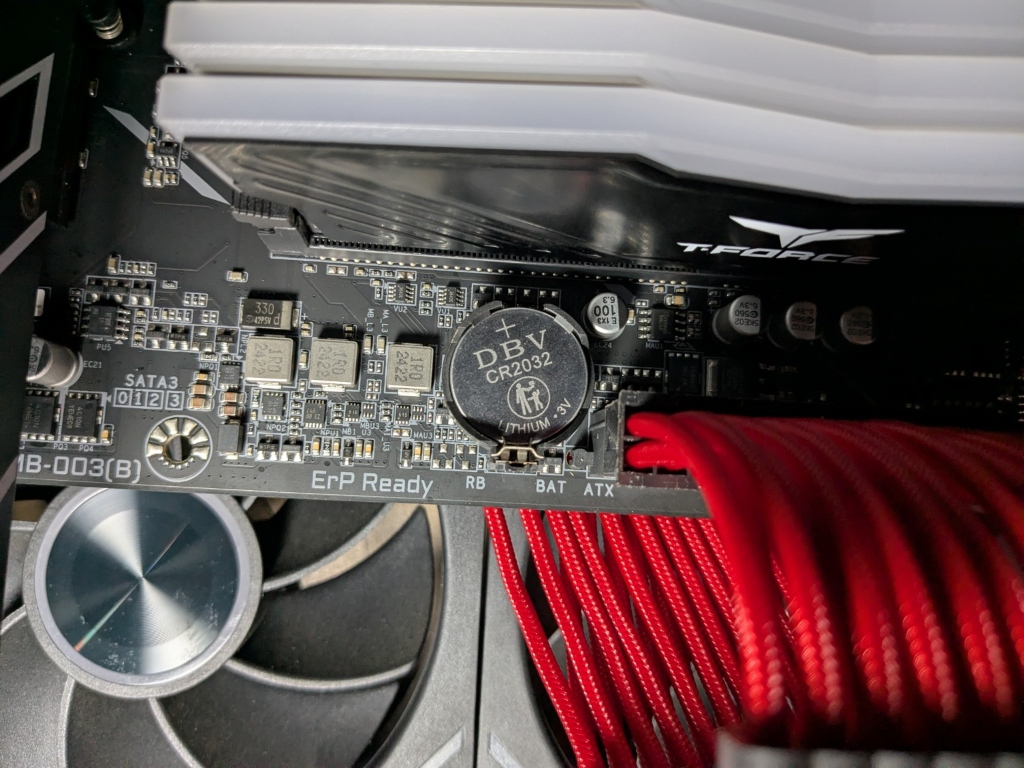
- Locate the silver coin-cell CR2032 battery on the motherboard (often hidden beneath the GPU).
- Pop the battery out using a small flathead screwdriver.
- Wait 5 minutes (or hold the power button for 30 seconds) to drain BIOS capacitors.
- Reinsert the battery and try booting.
Method B: JBAT1/CLRTC Jumpers
- Locate the two pins labeled
JBAT1orCLRTCon the motherboard. - Use a metal screwdriver to short the two pins together for 10 seconds while the PC is completely unplugged.
- Release, reconnect power, and boot. Note that the first boot after a CMOS reset may take up to 2-3 minutes due to memory retraining.
Frequently Asked Questions (FAQ)
Why does my PC light up and fans spin but there is no display?
This usually means your computer is receiving electrical power but is failing its POST (Power-On Self-Test). Before a computer can send a video signal to your monitor, the motherboard must run a lightning-fast hardware check on your CPU, RAM, and Graphics Card. If any of those components fail to check in properly, the system halts the boot process, leaving your lights and fans running while your screen stays completely black. The most common culprits are:
- A slightly loose or unseated memory stick (RAM)
- A display cable accidentally plugged into the motherboard instead of the dedicated GPU
- A corrupted or misconfigured BIOS/CMOS layout
- Loose or improperly seated internal power supply cables
What are the most effective fixes for a black screen on boot I can try right now?
If your system boots with no video output, the most reliable initial fixes include:
- RAM Reseating: Remove the RAM sticks, clean the contacts with a rubber eraser, and re-insert them into slot A2. Make sure they click securely.
- Clear CMOS: Remove the CR2032 silver motherboard battery for 5 minutes with the power supply disconnected to force a hardware reset.
- Check Cable Routing: Ensure the HDMI/DisplayPort cable is plugged into the graphics card ports and not the motherboard ports.
- Verify PSU Cables: Double-check that the CPU power connector (top left) and the main ATX power connector are fully clicked home.
What should I do if my system powers on with no display and no keyboard lights?
If your system boots without video output or keyboard light activity, this indicates a deep freeze at the very beginning of the POST check. The motherboard has halted its initialization routine before powering on the USB bus controller data channels.
This symptom points away from a monitor or cable problem. Instead, concentrate your troubleshooting on popping out your RAM modules and checking the CPU socket pins, CPU power cables (EPS 8-pin), and the motherboard's main electrical supply. A dead CPU or DRAM logic failure is the typical culprit.
My PC worked perfectly yesterday, but today it turns on with no display. How did it break overnight?
It is incredibly frustrating when a PC fails without you touching it, but it usually boils down to three invisible factors:
- Thermal Expansion/Contraction: As components heat up when in use and cool down when turned off, the microscopic metal pins inside the slots slightly expand and contract. Over time, this minute movement can cause a slightly loose RAM stick or graphics card to lose clean contact overnight.
- Static Build-Up: Residual electrical charge can pool on the motherboard capacitors while shut down, locking up the system logic. (Unplug the wall cord, hold the PC power button down for 30 seconds to drain it, then replug and try).
- Background Updates: Windows or a motherboard software utility may have pushed a critical firmware update right before you shut it down, leaving the BIOS in a temporarily corrupted state.
I just upgraded to a new CPU, and now I have a black screen. What went wrong?
If you kept your old motherboard but dropped in a brand-new, newer-generation processor, your motherboard likely doesn't have the updated firmware required to "speak the language" of the new CPU.
To fix this, you need to update your BIOS. If your motherboard has a physical button on the back labeled "BIOS Flashback," you can load the latest firmware onto a USB thumb drive using another computer and update it without needing an image on the screen. If your board doesn't have this button, you will have to temporarily reinstall your old CPU, boot into the BIOS to update the firmware, and then put the new CPU back in.